
Create a welcome screen that greets attendees at check-in
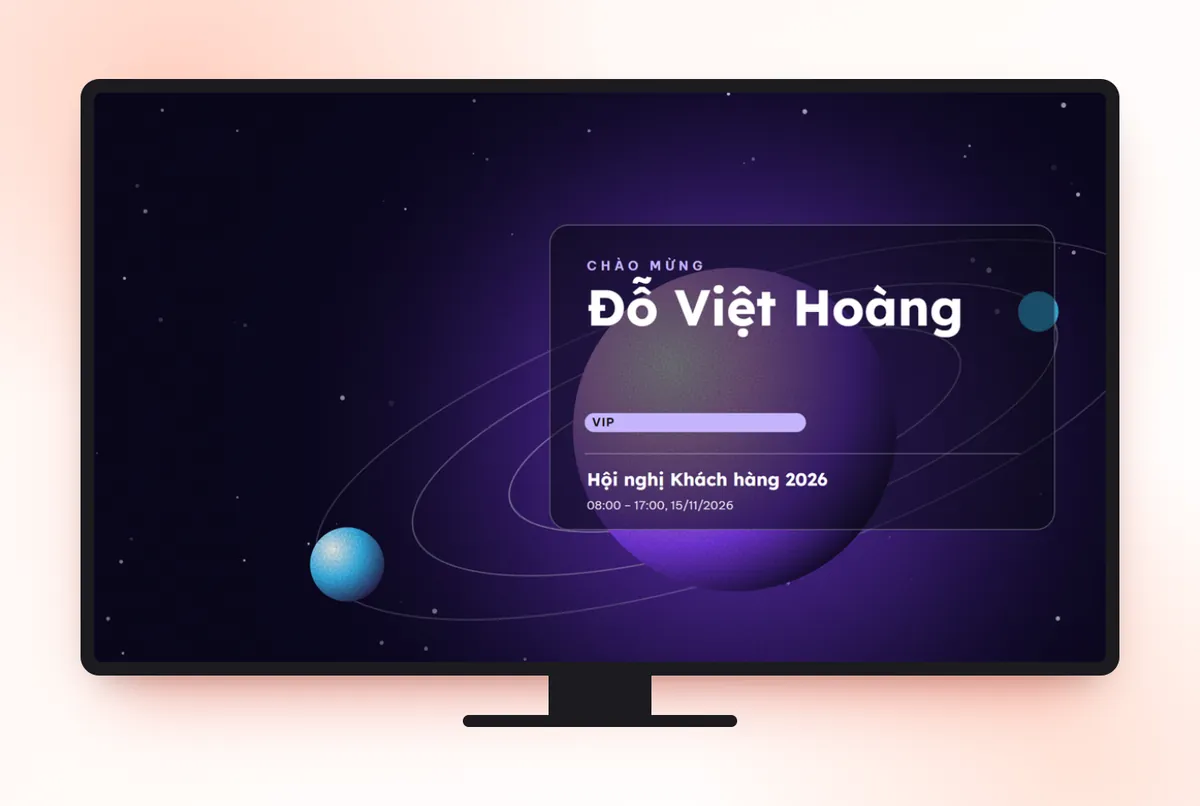
The welcome screen shows an attendee's name and details the moment they check in, in real time. This guide covers creating a screen, picking a template that fits your display, writing the greeting and opening it on a projector or LED screen.
On this page
The welcome screen is in the Check-in group of each ticket product. Whenever an attendee checks in, the big screen automatically shows a greeting with their details. You can create several screens at once, each following its own check-in source, and open them on a TV, projector, vertical standee or LED strip.
Step 1: Create a new screen
- Open the ticket product in Tickmi Studio and go to Check-in → Welcome screen.
- Click Create new screen. The Create welcome screen dialog opens.
- In the General section, enter a Screen name (for example "Main entrance screen") so you can tell screens apart when you have several.
Step 2: Choose a template for your screen shape
In the Display template section, choose a Screen template. The name, ticket type and other details of the person who just checked in are filled into the template automatically. Every new screen requires a template.
- Click Choose a welcome screen template to open your organization's templates and search by template name.
- Gallery: add ready-made templates. The gallery filters by Screen shape: Landscape (TV, projector), Portrait (standee, kiosk) or LED strip, so you can pick the shape of your real display.
- Design new: design from scratch. In the designer, the Screen size & guides tab lets you set the size to match your display, including 4K, 16:10, 3:4 or LED 21:9.
- Edit: opens the selected template in the designer in a new tab, and the form you are filling in stays as it is.
Choose the shape of your real screen to avoid black bars. The preview in Studio keeps the template's true ratio, so you can see right away how the layout looks on a vertical screen or LED strip. For details on designing templates, see Ticket design and template library.
Step 3: Write the greeting and choose what shows
For a screen that uses a template, the greeting and the details that appear (full name, job title, photo, Ticket type, Ticket code, Ticket No. or any fields you have collected) are set in the template itself, using the designer. To change the greeting or remove a field, click Edit, make your changes and save the template, then reload the display page to make sure the screen uses the new template. The ticket's QR code never appears on the welcome screen, because it is the ticket's private key.
Screens created in the older style (pick a theme and set each field yourself) keep working normally. When you edit them, you still see the older options:
- Guest information displayed: tick the fields to show and drag to set the order. The full name field has a greeting box; use the {{name}} variable to insert the attendee's name, for example "Welcome {{name}} to the event!".
- Show "Just checked in" list: a bar at the bottom of the screen lists the most recent attendees who checked in.
Older-style screens have a Switch to a template button for more choices and screen shapes.
Step 4: Set how it plays
In the Playback section, drag the Time on screen per attendee slider, from 2 to 30 seconds (default 6 seconds). When several people check in at once, the screen greets them one by one in check-in order. For busy entrances, set a short time, around 3-5 seconds, so the queue doesn't pile up.
Step 5: Choose check-in sources
The Check-in sources section decides who the screen greets. By default the All sources switch is on: every successful check-in is greeted. Turn it off to pick sources one by one:
| Source | Use it when |
|---|---|
| Manual check-in (Studio) — any staff member | Staff check in on the Studio web app |
| Barcode reader (Studio) — all staff | The desk uses a barcode/QR reader, see Web check-in and barcode scanners |
| Self check-in kiosk (guest scans themselves) | Attendees check themselves in at a web kiosk, see Self check-in kiosk |
| Self check-in kiosk (reader) | A self check-in kiosk with a barcode reader attached |
| App Studio kiosk mode | A kiosk running in the Tickmi Studio mobile app |
| Staff: [name] | Only greet people checked in by one specific member |
Click Save to create the screen.
Step 6: Run several screens at once
Each screen has its own link, so you can put a landscape screen in the main lobby following the self check-in kiosk and an LED screen at a side entrance following the barcode readers. Each screen card shows On or Off; a screen that is off needs its Enabled switch turned on to get the display link. The card also shows the template in use, the sources it follows and the seconds per attendee.
Step 7: Open full screen on a projector or LED
- On the screen card, click Copy link or Open screen.
- Open the link in the browser of the computer connected to the projector, TV or LED screen controller. The display page needs no login.
- Click the full screen button on the display page (or press F11) to hide the browser bar. While waiting, the screen shows Waiting for guests to check in....
- Check in one test ticket to confirm the greeting appears correctly.
If the network drops, the display page shows Disconnected — retrying... and reconnects on its own, with no need to reopen the link. If the link leaks, click Rotate link (invalidate old link). The old link stops working immediately, and screens showing it must reopen with the new link. Deleting a welcome screen also stops its link and QR immediately.
Operating tips
- Prepare a day ahead: open the link on the exact screen you'll use, check in with an internal test ticket, then delete the test scan from the scan history.
- Turn off sleep mode and the screensaver on the computer connected to the big screen.
- Combine with the check-in stats screen to greet attendees and track the numbers at the same time.
- For an overview of the solution, see check-in software and QR code check-in.
Frequently asked questions
How many welcome screens can I create for one ticket product?
You can create several screens at once. Each has its own link and follows its own check-in sources.
What does the screen show when many people check in at the same time?
The screen greets them one by one in check-in order, each for the time you set under Time on screen per attendee (2-30 seconds).
How do I disable a screen link I've already shared?
Click Rotate link (invalidate old link) on the screen card. The old link stops working immediately and you reopen the screen with the new link.
Where do I change the greeting on a screen that uses a template?
Click Edit in the Display template section to open the designer in a new tab, change the greeting and save the template. Reload the display page to show the new greeting.
The Tickmi team is here to help on hotline 0349 632 920, or try Tickmi for free and follow along.