
Print labels and badges for attendees
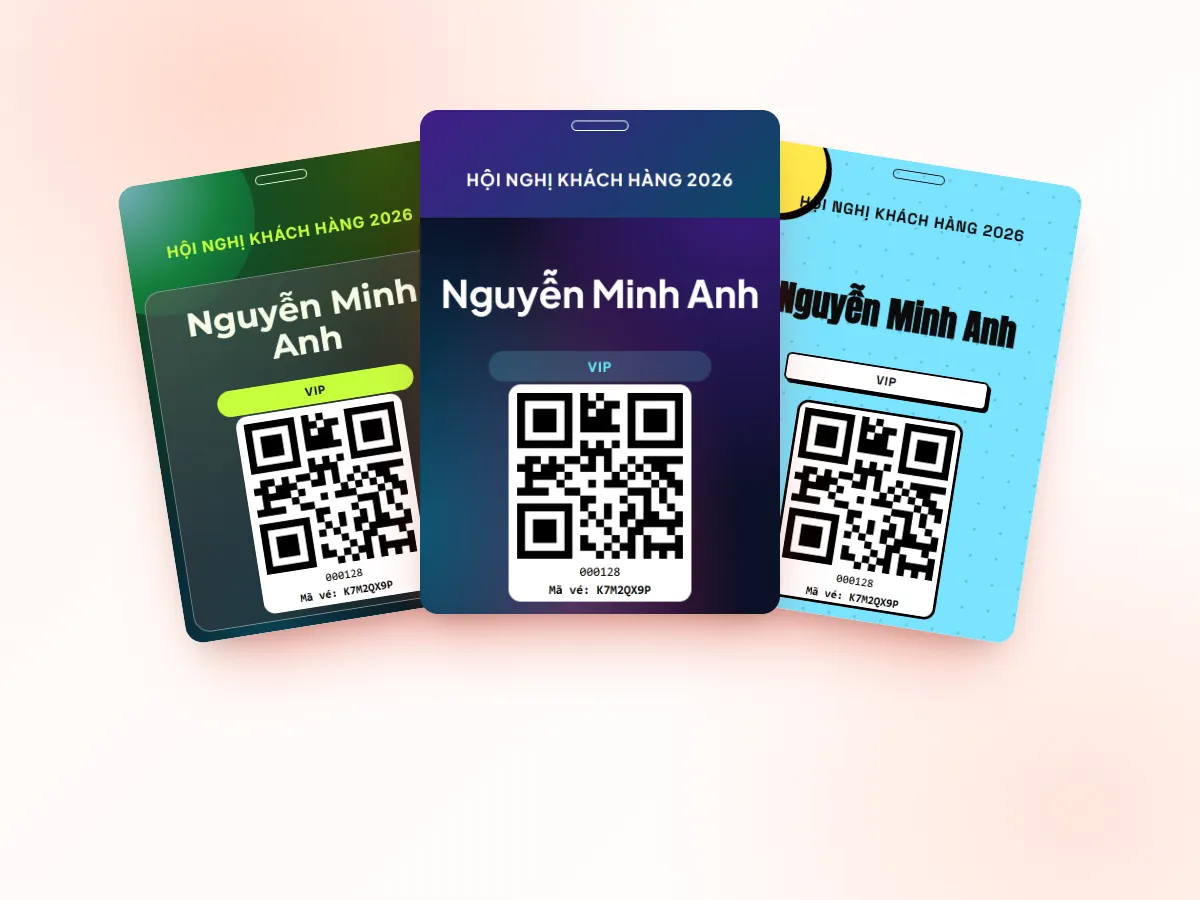
Tickmi prints stickers and badges with each attendee's own information: automatically the moment a check-in succeeds at the desk, or in bulk before the event day.
On this page
On the Tickmi Studio web app, each ticket product has two printing sections in the Check-in group of the product menu: Print tag (sticker labels, printed on a thermal label printer or a regular printer) and Badges (1-sided or 2-sided badges that attendees wear on a lanyard). Both share the same printer selection, the same auto print station and the same Tickmi Print app for printing directly without a dialog.
1. Choose a label template
- Open the ticket product on the Tickmi Studio web app → Check-in → Print tag. The screen has two steps: Tag template and Print.
- Under Tag style, choose Designed template (uses a label template with your logo, colors and layout), then click Choose a tag template to pick one of yours or add more from the Template gallery. Or choose Simple: tick the fields to print and the system lays them out for you.
- With the Simple style, choose the Tag size that matches the label roll you have. There are 9 sizes: 100 x 150 mm (lanyard name badge), 100 x 100 mm (square label), 62 x 100 mm (small sticker), 54 x 86 mm (card size), 100 x 50 mm, 70 x 50 mm, 60 x 40 mm (landscape labels), 50 x 30 mm and 40 x 30 mm (small labels). On landscape labels, the QR code sits on the left and the information on the right.
- Under Information shown on the tag, tick the fields to print and drag and drop to set their order. The list follows your organization's attendee information fields, including custom fields; you can also add QR code, Ticket code, Ticket number and Ticket type. The Preview shows the label using sample data.
- In the Print step, set Copies per print, for example 2 so one label goes on the badge and one on the gift bag.
- Click Save configuration.
To design your own label template, see Ticket design and template library. Keep every element inside the template frame: an element dragged outside the frame can make the printed label smaller than the real size.
Print a label for one person
Besides automatic printing, you can reprint a label for a specific person from Check-in → Scan history: each scan has a Print tag button, handy when a label is damaged or the attendee needs an extra copy.
2. Choose a 1-sided or 2-sided badge template
- Open Check-in → Badges. In the Badge template step, click Choose a badge template. The Preview shows the badge size in mm.
- In the How to print step, choose:
- Page layout: One badge per page or Arrange on A4 (several badges on one sheet, cut along the lines).
- Paper: Centered on A4 (each badge is printed in the middle of an A4 sheet with cut marks, for office printers, with two-sided printing that lines up the front and back correctly) or Exact badge size (the printed page matches the badge size, only for badge printers or printers loaded with that exact paper size).
- Two-sided: Both sides on 1 sheet (the printer must support duplex printing) or 2 separate sheets (for printers that print one side only; then glue or fold).
- Click Save changes.
The badge template and page layout are saved per ticket product. The paper size, two-sided option and printer are remembered separately on each computer and shared with the auto print station. So the printer at the desk needs to be selected once, even if you already selected it on an office computer.
An office printer printing a small badge size often outputs a tiny image in the corner of the sheet and cannot print two-sided. If this happens, switch Paper to Centered on A4.
3. Install Tickmi Print to print directly
Without Tickmi Print, every print opens the browser's print dialog: you have to pick the right printer, the paper size that matches the label and margins set to "None". Tickmi Print is a small app that runs in the background on the Windows, macOS or Linux computer at the desk: choose the printer once, and every label and badge afterward prints directly at the right size without asking again.
- In the Printer section, click Download Tickmi Print for your operating system and install it.
- Go back to Tickmi Studio and click Check again until you see Connected to Tickmi Print.
- Choose the label printer, the badge printer (and the ticket printer if needed), then click Test print.
For thermal label printers connected by USB or network, Tickmi Print has a group called Direct print (no driver) — recommended. For the full guide to downloading, installing on each operating system, test printing and troubleshooting, see Install Tickmi Print.
On macOS, use Chrome, because Safari may block the connection to Tickmi Print. PDF/XPS printers cannot print directly because they need to ask for a file name.
4. Auto-print at check-in: the print station
- On the computer connected to the printer, click Open auto print station in the Print tag section, or click the same button in the Badges section. You need to save the configuration before opening the station.
- Under Print for each check-in, choose Tag, Badge or Both (each check-in prints 1 label on the label printer and 1 badge on the badge printer).
- Under Check-in sources to print, choose the sources this station accepts. By default the station prints only scans by the account that is signed in (on the web and in the ticket scanning app). You can also pick groups such as Self check-in kiosk and Tickmi Studio app, individual scanning staff members, or All sources.
- Under Ticket types to print, untick the ticket types you do not need to print, for example when VIPs have their own station.
- Click Start auto-printing. The station shows Waiting for check-ins.
From then on, every successful check-in from the app, a kiosk or the web prints automatically on this computer. Failed scans and tickets that were already checked in do not print. The Recent tags (or Recent badges) list shows the statuses Printed, Failed and Skipped, plus a Reprint button.
The print station when the network drops or the printer has a problem
- The choices on the station page are saved per account on that computer. If you reload the page or go to another screen and come back, the station resumes on its own and prints any check-ins it missed.
- If the network drops, the station shows Connection lost — retrying and resumes printing when the connection is back.
- If the printer runs out of paper, has its cover open or has a paper jam, the station pauses, keeps the waiting jobs and prints again when the printer is ready. The screen shows the steps to fix each error.
- Open only one station for the same ticket product in one browser. A second tab will tell you the station is running in another tab, to avoid duplicate printing.
5. Bulk-print badges
In the Print badges step of the Badges section:
- By person: search by name, phone, email or ticket number, tick the people you want, then click Print selected badges.
- By ticket type: filter by Ticket type, and optionally turn on Only tickets without a printed badge.
- Whole list: click Print all badges in the filter.
Each ticket has a status of Not printed or Printed n times; cancelled tickets are skipped automatically. Click Test print first: Tickmi prints a test badge marked FRONT, BACK and an arrow on the top edge, using the paper size and two-sided option you selected, so you can check that the back lands exactly behind the front, in the same direction as the arrow.
Need to print paper tickets? See Download and print tickets in bulk. Attendees who check themselves in at the desk can also get a label printed, see Self check-in kiosk. Learn more about printing event badges.
Frequently asked questions
Can I print without installing Tickmi Print?
Yes. The browser opens the print dialog for each print job; you choose the printer, paper size and margins, then print. Tickmi Print lets you print directly without the dialog.
Which paper size should I choose for badges on an office printer?
Choose Centered on A4, or Arrange on A4 with cut lines. Exact badge size is only for badge printers or printers loaded with that exact paper size.
Does the print station reprint when a ticket is scanned twice?
No. The station prints only for successful check-ins; failed scans and tickets that were already checked in do not print. To print again, use the Reprint button on the station or the Print tag button in Scan history.
If I reload the Print Station page, do I lose check-ins?
No. The station resumes on its own and prints the check-ins it missed. Only a label that was mid-print when you reloaded is marked as failed, so you can check it and click Reprint if needed.
The Tickmi team is here to help on hotline 0349 632 920, or try Tickmi for free and follow along.